 Pin It
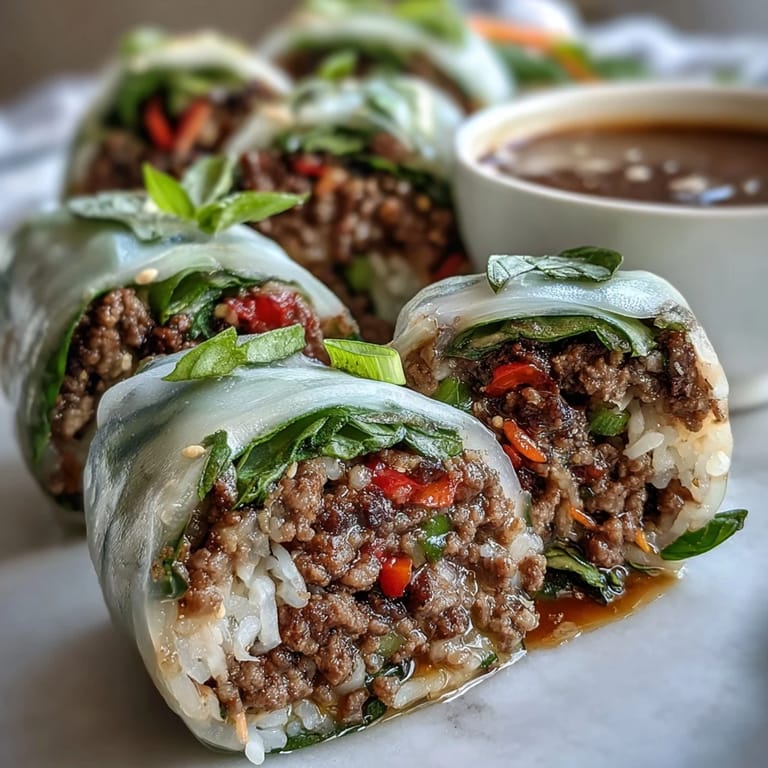
 The first time I attempted fresh spring rolls, my kitchen counter looked like a rice paper disaster zone. Wrappers tore everywhere, fillings spilled onto the floor, and I ended up eating everything out of a bowl with a spoon. But something about that combination of savory beef, bright herbs, and crisp vegetables kept me trying. Now after dozens of attempts, I have finally mastered the art of the perfect roll without the kitchen chaos.
Last summer I made these for a backyard gathering and watched my friends face light up at first bite. She immediately demanded the recipe, and now whenever we hang out, these rolls appear on the menu without either of us saying a word. There is something magical about wrapping all those vibrant flavors in translucent paper that makes people feel like they are eating something truly special.
Ingredients
- Ground beef (85-90% lean): The fat content here is crucial because it keeps the beef mixture juicy and flavorful even after cooling
- Thai basil: This has a distinct anise-like kick that regular basil lacks and it holds up better to cooking
- Rice paper wrappers: Look for the 22cm diameter size as smaller ones make rolling frustrating and larger ones tear easily
- Fish sauce: The salty backbone of the filling and dipping sauce, there is really no substitute that tastes authentic
- Fresh herbs (cilantro, mint, basil): Do not skimp here because the fresh herbal punch is what makes these rolls sing
Tired of Takeout? 🥡
Get 10 meals you can make faster than delivery arrives. Seriously.
One email. No spam. Unsubscribe anytime.
Instructions
- Mix the sauce seasoning:
- Combine soy sauce, fish sauce, oyster sauce, dark soy sauce if using, and sugar in a small bowl. Stir until the sugar completely dissolves then add water to create a glossy, pourable consistency.
- Cook the aromatics:
- Heat oil in a large skillet or wok over medium-high heat. Add garlic and shallot then stir-fry for 30-45 seconds until fragrant and just turning golden.
- Add the heat:
- Toss in minced chilies and the white parts of the green onions. Stir-fry for 20-30 seconds until the kitchen fills with their spicy aroma.
- Brown the beef:
- Add ground beef, crumbling it with your spatula as it cooks. Let it cook for 4-6 minutes, stirring frequently, until mostly browned with some crispy golden spots.
- Soften the peppers:
- Add the diced red bell pepper and cook for 2-3 minutes until slightly softened but still with some crunch.
- Add the sauce:
- Pour the sauce seasoning over the beef and toss everything together. Cook for 2-3 minutes, letting the sauce reduce until it clings to the meat.
- Finish with basil:
- Reduce heat to low then add chopped Thai basil and green parts of green onions. Toss just until the basil wilts, about 30-45 seconds.
- Cool completely:
- Turn off the heat and stir in the lime juice. Let the beef mixture cool to room temperature before rolling because hot filling will tear the rice paper.
- Prep the dipping sauce:
- Whisk together fish sauce, lime juice, sugar, and warm water until dissolved. Add garlic, chilies, carrot, and herbs then taste and adjust the balance.
- Set up your station:
- Fill a large shallow dish with warm water and arrange all your fillings in bowls. Lightly oil your rolling board to prevent sticking.
- Soften the wrapper:
- Dip one rice paper wrapper in warm water for 3-5 seconds, rotating it to moisten all over. Place on your board because it will continue softening as you work.
- Layer the filling:
- Place cooled rice or noodles on the bottom third then add beef mixture, cucumber, carrot, lettuce, and plenty of fresh herbs.
- Roll it up:
- Fold the bottom edge over the filling, fold in the sides, then roll tightly away from you to form a neat cylinder.
- Serve and enjoy:
- Place rolls seam-side down on a plate and serve immediately with the dipping sauce or slice them diagonally for a pretty presentation.
 Pin It
 My sister once tried to help me roll these during a family dinner and we ended up with the ugliest, most delicious lopsided rolls on the planet. We laughed so hard we cried but honestly those imperfect rolls tasted just as amazing as the picture-perfect ones.
Making Ahead
The beef filling keeps beautifully in the refrigerator for 3-4 days and actually develops deeper flavor overnight. Just bring it to room temperature before rolling to avoid tearing the wrappers. The dipping sauce can also be made ahead and stored in a jar.
Rolling Like A Pro
Do not overfill your wrappers or they will burst when you try to roll them. Think less is more because you can always make more rolls but you cannot fix an overstuffed torn one. Keep your hands slightly damp while working to prevent the rice paper from sticking to your fingers.
Serving Suggestions
These rolls make an incredible light lunch or impressive appetizer for a dinner party. Pair them with a cold beer or crisp white wine to complement the fresh, bright flavors. They are also perfect for summer picnics because they travel well and taste amazing at room temperature.
- Slice them diagonally right before serving for that restaurant-style presentation
- Offer extra dipping sauce on the side because everyone always wants more
- Cover leftovers with a damp paper towel and plastic wrap to prevent drying out
 Pin It
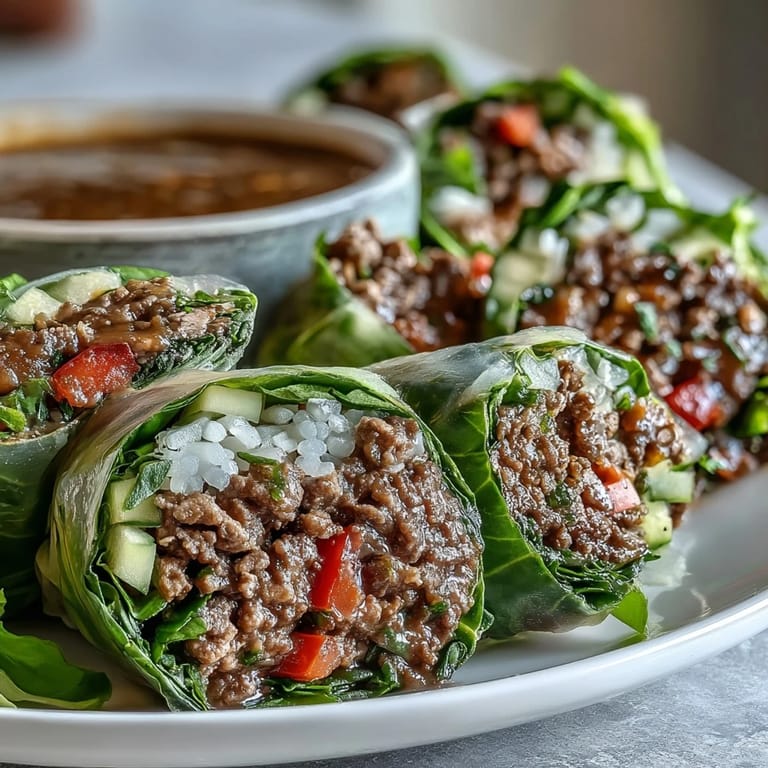
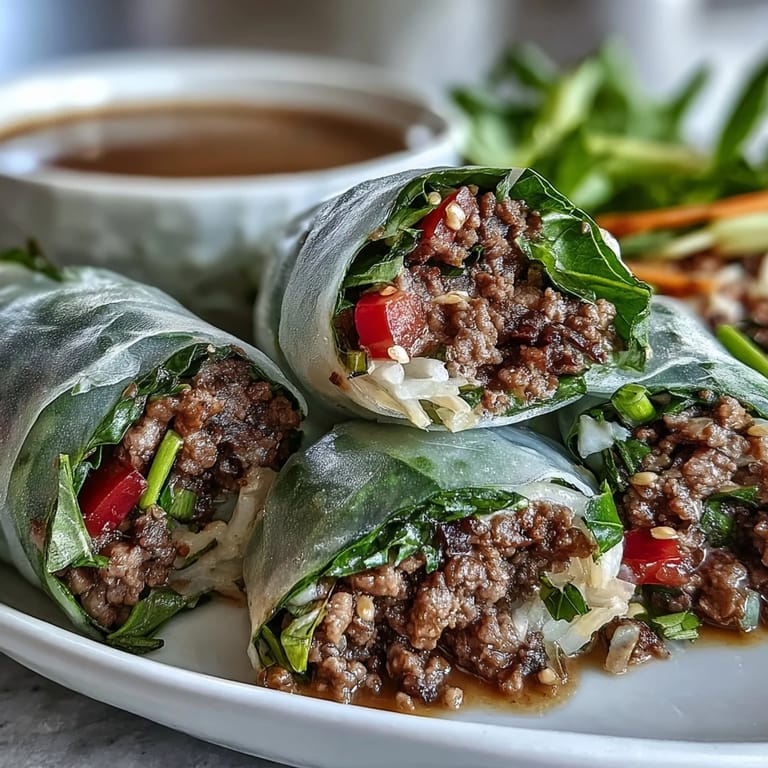
 There is something deeply satisfying about biting through that soft, translucent wrapper into layers of savory beef and crisp fresh herbs. These rolls have become my go-to for bringing people together around food that feels both nourishing and special.
Recipe FAQs
- → Can I make these beef rolls ahead of time?
Yes, prepare the beef filling up to 2 days in advance and store it refrigerated. Assemble rolls 2-3 hours before serving—any longer and the rice paper becomes tough. Keep assembled rolls covered with a damp towel and plastic wrap, then bring to room temperature 10-15 minutes before serving for the best texture.
- → What can I substitute for Thai basil?
Thai basil has a distinct anise-like flavor, but you can use sweet Italian basil combined with a hint of mint to approximate the taste. Fresh mint leaves in the filling also help mimic the aromatic profile. If neither is available, regular basil still works well—just add a bit more to compensate for the milder flavor.
- → Are these rolls gluten-free?
Rice paper wrappers are naturally gluten-free, and the beef filling uses gluten-free ingredients. However, soy sauce, oyster sauce, and dark soy sauce typically contain wheat. To make these completely gluten-free, use tamari or gluten-free soy sauce, and check that your oyster sauce brand is certified gluten-free. The dipping sauce can also be made with gluten-free fish sauce and tamari.
- → How do I prevent rice paper from tearing?
Use warm—not hot—water when softening wrappers. Dip for just 3-5 seconds, rotating to moisten evenly. The paper continues softening as you work, so don't oversoak. Place wrappers on a lightly oiled board or plate to prevent sticking. If wrappers feel too fragile, let them sit 30 seconds after dipping before adding filling.
- → Can I use a different protein?
Absolutely. Ground turkey, chicken, or pork work well with the same seasonings. For a vegetarian version, use crumbled tofu, textured vegetable protein, or chopped mushrooms sautéed with the same aromatic base. Adjust cooking times accordingly—lean meats cook faster than beef, while plant-based proteins may need less time.
- → What's the best way to store leftovers?
Fresh rolls don't store well—the rice paper becomes tough and vegetables lose their crunch. If you must store them, wrap individually in plastic wrap and refrigerate up to 1 day. Better approach: store beef filling and prepped vegetables separately, then assemble fresh when ready to eat. The beef mixture keeps 3-4 days refrigerated and can also be frozen for up to 3 months.