 Pin It
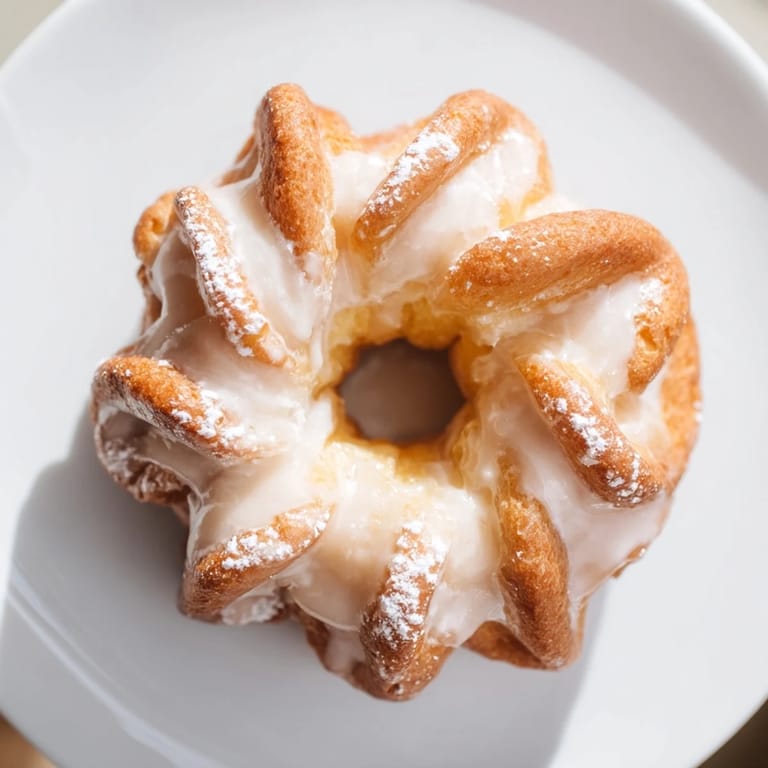
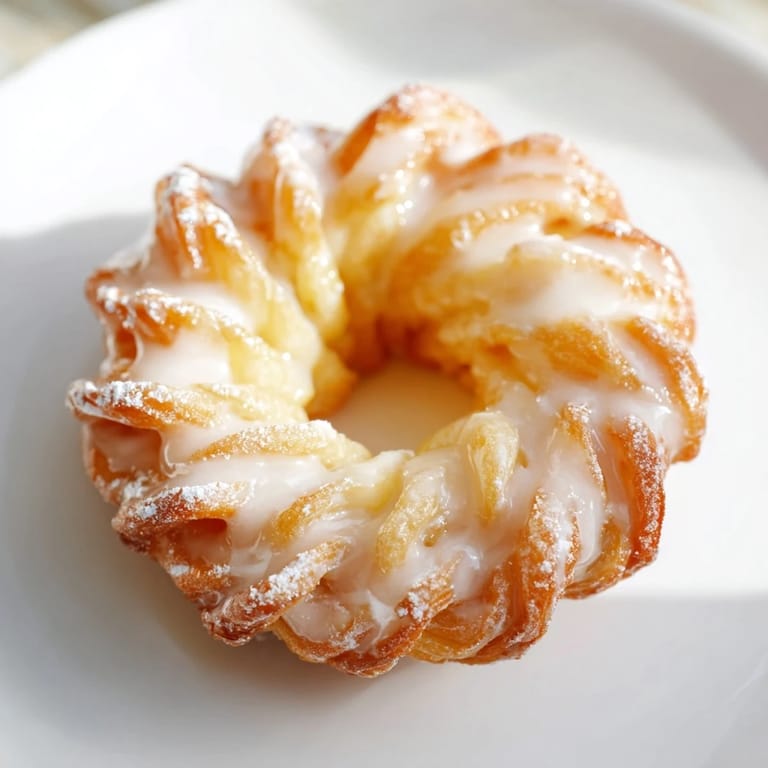
 The first time I piped a batch of choux pastry into those perfect twisted rings, I was convinced something would go wrong. But watching them puff up in the hot oil, golden and impossibly airy, felt like a small kitchen miracle. French crullers aren't complicated, but they reward patience and a little faith in the process. Once you nail the technique, you'll find yourself making them for every occasion that calls for something special.
I made these for my sister's book club once, and the moment she bit into one warm from the cooling rack, her eyes lit up in that way that tells you you've done something right. She said they tasted like Paris, which made me laugh because I'd only ever made them in my small kitchen with a saucepan and a piping bag. But that's the magic of these crullers—they feel fancy and French, yet they're genuinely approachable.
Ingredients
- Water: Room temperature water helps the butter melt evenly and prevents the choux from seizing up when you add the flour.
- Unsalted butter: Cut into pieces so it melts uniformly and incorporates smoothly into the dough.
- Granulated sugar: Just a tablespoon adds subtle sweetness and helps with browning during frying.
- Salt: A quarter teaspoon balances the richness and brings out the flavor of everything else.
- All-purpose flour: Weigh it if you can—it makes the texture more consistent batch to batch.
- Eggs: Room temperature eggs incorporate better and create a silkier dough; cold eggs will clump.
- Vanilla extract: Use pure vanilla, not imitation—it makes a noticeable difference in the final taste.
- Powdered sugar: Sift it before mixing into the glaze to avoid lumps that catch in your teeth.
- Milk or water for glaze: Use milk for richness or water for a cleaner taste; add slowly until you reach the right consistency.
- Neutral oil: Choose one with a high smoke point like canola or sunflower oil so it stays stable at 350°F.
Tired of Takeout? 🥡
Get 10 meals you can make faster than delivery arrives. Seriously.
One email. No spam. Unsubscribe anytime.
Instructions
- Start the base:
- Combine water, butter, sugar, and salt in a saucepan and bring to a boil, stirring gently until the butter melts completely. You'll know it's ready when you see the butter fully incorporated and the liquid is rolling at a full boil.
- Toast the flour:
- Add the flour all at once and stir hard with a wooden spoon for about two minutes until the mixture pulls away from the sides of the pan in a cohesive ball. This cooking step is crucial—it dries out the dough slightly, which helps create that signature airy texture.
- Cool and incorporate eggs:
- Remove from heat and let sit for a few minutes so the dough cools enough to handle eggs without scrambling them. Add one egg at a time, beating well after each addition until the dough becomes smooth and glossy before you add the next one.
- Season and prepare for piping:
- Mix in vanilla extract, then transfer the dough to a piping bag fitted with a large star tip. The dough should be thick but move through the tip easily—not too stiff, not too loose.
- Pipe into twists:
- Cut parchment squares about 3 by 3 inches and pipe a 3-inch twisted ring of dough onto each one. The twist is just aesthetic, so don't stress if they aren't perfect—the oil will make them beautiful.
- Heat the oil:
- In a heavy pot or deep fryer, bring neutral oil to exactly 350°F. Use a thermometer—too hot and they'll brown outside before puffing inside, too cool and they'll absorb oil and become greasy.
- Fry with precision:
- Carefully slide 2 to 3 crullers (still on parchment) into the oil parchment-side down. After about 1 to 2 minutes, use tongs to gently peel away the parchment, then fry for another 2 to 3 minutes per side until they're golden and puffy.
- Drain and glaze:
- Transfer cooked crullers to a cooling rack to drain. Once slightly cooled, dip each one into glaze, let the excess drip off, and return to the rack so the glaze sets.
 Pin It
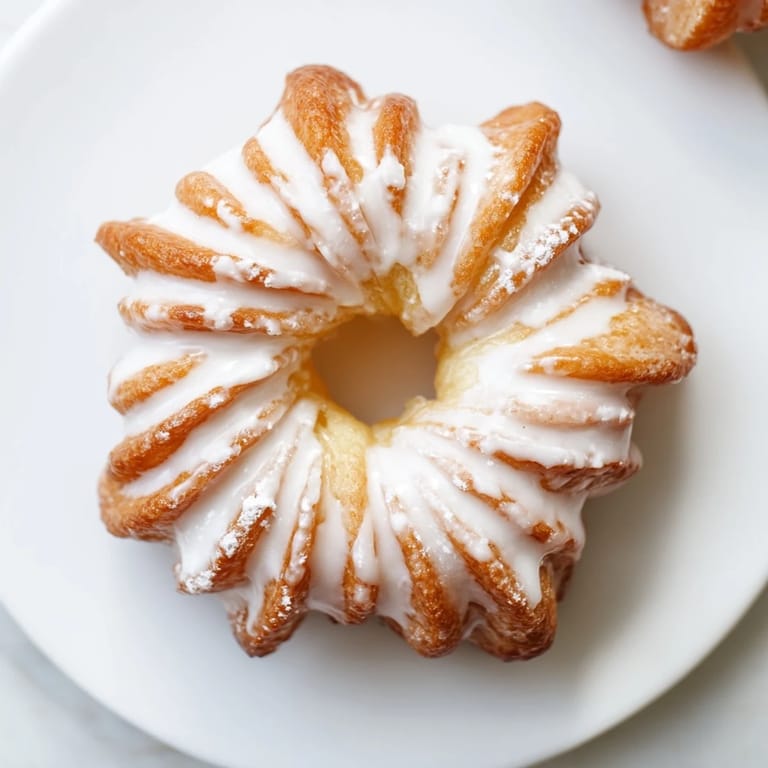
 There's something almost meditative about watching crullers rise and turn golden in hot oil, knowing that in a few minutes you'll have something warm and fragrant to share. My kitchen always smells a little like a French patisserie on cruller day, and somehow that simple aroma makes everything feel a bit more special.
Troubleshooting Common Issues
If your crullers turn out dense instead of airy, the choux dough likely wasn't cooked long enough when you mixed in the flour—that initial cooking step really matters. If they're browning too quickly on the outside while staying raw inside, your oil is too hot; drop it back to 340°F and try again. And if the glaze is too thick to dip, just warm it slightly or add another teaspoon of milk.
Customizing Your Crullers
The beauty of choux pastry is how versatile it is once you master the base. I've added lemon zest to the glaze on a whim and loved it, and I've also experimented with cinnamon sugar dusted over them while still warm instead of using glaze. You could even dip them in melted chocolate for something richer, or try an orange-flavored glaze if citrus is your thing.
Making Them Ahead and Storing
Choux pastry dough can be piped onto parchment squares and refrigerated for up to a few hours before frying, which is helpful if you're planning ahead. Once fried and glazed, they're best eaten the same day when the texture is at its peak, but they'll keep in an airtight container for a day or two if you need them to. If they soften, a quick 5-minute stint in a 300°F oven will crisp them back up.
- Store leftovers in an airtight container at room temperature, not the refrigerator, to keep them crispy.
- If you want to bake instead of fry, bake the piped crullers at 400°F for 20 to 25 minutes until golden, though the texture won't be quite as crisp.
- For a special touch, serve them with coffee or strong black tea the way they do in France.
 Pin It
 Making crullers is one of those cooking moments that feels like a small act of love, whether you're making them for someone else or just for yourself. Once you've mastered the technique, you'll find reasons to make them again and again.
Recipe FAQs
- → What dough is used for these crullers?
The dough is a choux pastry, which creates a light and airy texture when cooked.
- → How do I achieve the twisted shape?
The dough is piped into twisted rings using a piping bag fitted with a large star tip.
- → Can these be baked instead of fried?
Yes, baking at 400°F (200°C) for 20–25 minutes yields a less crisp but still delicious cruller.
- → What type of oil is best for frying?
Neutral oils like canola, sunflower, or vegetable oil work best for deep frying.
- → How is the glaze prepared?
The glaze combines powdered sugar, milk or water, and vanilla extract whisked until smooth and used to coat the warm crullers.
- → Can I add flavors to the glaze?
Adding finely grated lemon or orange zest to the glaze creates a light citrus twist.